
Ruger American Trigger Adjustment Instructions: A Comprehensive Guide
This guide details adjusting the Ruger American rifle’s trigger, covering pull weight, creep, and over-travel.
It references NRApubs, Gunsite Academy, and user experiences with Gen 2 models.
Always prioritize safety and understand Ruger’s specifications before modifying your firearm.
Adjustments can impact warranty and require careful verification post-adjustment.
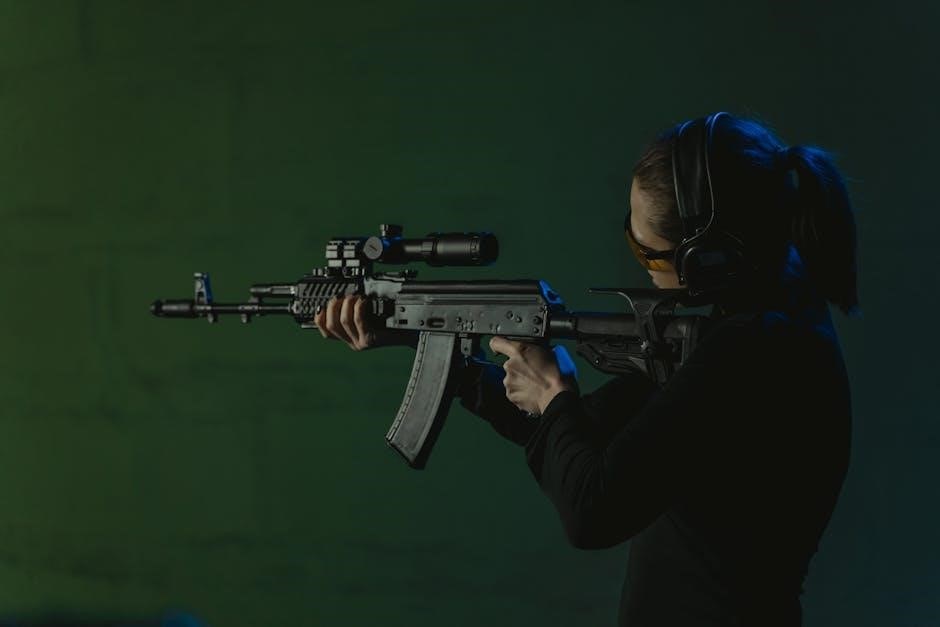
The Ruger American rifle boasts a trigger system designed for accuracy and reliability, yet often benefits from user adjustment to achieve a preferred pull weight and feel.
Initially, the trigger arrived with a heavier pull, prompting many owners to explore customization options.
Ruger’s design incorporates a simple, yet effective adjustment screw, allowing shooters to fine-tune the trigger’s performance.
Understanding the system’s mechanics is crucial before attempting any modifications.
The trigger’s functionality relies on a precise interaction between the pull weight screw, and in some models, an over-travel screw.
This system aims to provide a crisp, clean break, enhancing shooting precision.
However, factory settings may not always align with individual preferences, making adjustment a common practice among enthusiasts.
Proper adjustment requires patience and a methodical approach, prioritizing safety at every step.
Safety Precautions Before Adjustment
Prior to any trigger adjustment, absolute safety is paramount. Always, and without exception, ensure the rifle is completely unloaded.
Remove the bolt and visually inspect the chamber to confirm no ammunition is present. Double-check the magazine well as well.
Work in a clean, well-lit area free from distractions. Never attempt trigger adjustments with live ammunition nearby.
Consider using snap caps during function testing after adjustment, but only after verifying complete safety.
Understand that improper adjustment can lead to accidental discharges.
If you are uncomfortable with the process, seek assistance from a qualified gunsmith.
Ruger explicitly states the importance of post-adjustment function testing and re-evaluation of safety mechanisms.
Always refer to Ruger’s official warnings regarding modification responsibility.
Tools Required for Trigger Adjustment
Successful Ruger American trigger adjustment necessitates a few essential tools. A quality gunsmithing screwdriver set is crucial, specifically with bits to fit the trigger adjustment screw(s).
Ensure the screwdriver head precisely matches the screw to prevent damage.
A small punch set can be helpful for gently assisting in screw adjustments, though direct screwdriver manipulation is generally preferred.
Snap caps are vital for function testing after adjustment, simulating firing without live ammunition.
A trigger pull scale, while not strictly required, provides objective measurement of pull weight before and after adjustments, aiding in precise tuning.
Good lighting and magnification (a jeweler’s loupe) can also be beneficial for detailed inspection.
Avoid using excessive force with any tools, as this can damage the trigger mechanism.

Locating the Trigger Adjustment Components
Identifying key components is the first step. The trigger pull weight screw is typically located within the trigger assembly, while an over-travel screw may also be present.
Identifying the Trigger Pull Weight Screw
Locating the trigger pull weight screw is crucial for adjustment. On the Ruger American rifle, this screw is generally found within the trigger housing, often accessible from the bottom of the rifle after removing the action from the stock. It’s the primary screw responsible for controlling the amount of force needed to depress the trigger.
The screw closest to the rifle butt typically adjusts pull weight. Be cautious, as turning it in too far can prevent the rifle from firing. Identifying this screw correctly is paramount before making any adjustments. Refer to online videos and diagrams for visual guidance, as screw placement can vary slightly between models. Remember to consult multiple sources to confirm its location.
Carefully observe the screw’s position and orientation before attempting any turns. A small screwdriver is usually required for precise adjustments.
Understanding the Over-Travel Screw (If Applicable)
Not all Ruger American rifles feature an over-travel screw. This screw, when present, controls the amount of rearward movement the trigger has after the hammer releases. Excessive over-travel can contribute to inaccurate shooting, as it introduces inconsistency. Identifying its presence is the first step.
If equipped, the over-travel screw is usually smaller and located near the trigger pull weight screw within the trigger housing. Adjusting it involves tightening to reduce over-travel, but caution is advised. Over-tightening can cause the trigger to bind or prevent proper reset.
Carefully observe the trigger’s movement before and after adjustments. Small increments are key. If your Ruger American lacks this screw, focus solely on the pull weight adjustment.
Recognizing the Safety Mechanism Interaction
The Ruger American’s safety system is integral to trigger function. Understanding this interaction is crucial before any adjustment. The safety prevents the trigger from being pulled when engaged, and a properly functioning safety must remain operational after adjustment.
Ensure the safety lever moves smoothly and positively locks the trigger. Adjustments should not impede the safety’s ability to fully engage or disengage. Any resistance or alteration in the safety’s function is a serious warning sign.
Always test the safety thoroughly before and after making any trigger adjustments. A compromised safety renders the rifle unsafe. Prioritize safety above all else during this process.

Step-by-Step Trigger Adjustment Process
Begin by clearing and securing the rifle, then locate the adjustment screw.
Assess the initial pull weight before making incremental changes, always prioritizing safety throughout the process.
Clearing and Securing the Rifle
Before commencing any trigger adjustment, absolute firearm safety is paramount. Begin by meticulously clearing the Ruger American rifle of all ammunition. Remove the magazine and visually and physically inspect the chamber to ensure it is entirely empty.
Following chamber verification, operate the action several times to eject any potential lingering rounds. Once confirmed clear, leave the bolt in the open position. This provides a clear visual indication that the rifle is unloaded.
Secure the rifle on a stable, level surface, preferably a gunsmithing mat or workbench. Ensure it cannot move or fall during the adjustment process. Never work on a firearm while it is held in your hands or positioned precariously. Double-check all safety measures before proceeding to the next step.
Initial Assessment of Trigger Pull Weight
Before adjusting the trigger, establish a baseline measurement of the current pull weight. A digital trigger pull scale is the most accurate method, providing a numerical reading in pounds. If a scale isn’t available, a consistent, subjective assessment is necessary.
Slowly squeeze the trigger, noting the amount of force required to break the shot. Pay attention to the feel – is it crisp, gritty, or heavy? Many users report factory triggers around 3.5 pounds, but variations exist.
Record your initial assessment. This provides a reference point to gauge the effectiveness of your adjustments. Remember Ruger specifies a minimum pull weight; avoid adjustments below this limit for safety reasons.
Adjusting the Trigger Pull Weight Screw – Clockwise/Counter-Clockwise
Locate the trigger pull weight screw, typically found near the trigger mechanism. Turning the screw clockwise generally increases the pull weight, making the trigger heavier. This requires more force to fire the rifle. Conversely, turning it counter-clockwise decreases the pull weight, resulting in a lighter trigger pull.
Exercise extreme caution. Over-adjustment can lead to unintended consequences, including a trigger that is too light for safe operation or a complete failure to function. Small adjustments are crucial; avoid large turns of the screw.
Remember the warning: turning the screw in too far can prevent the rifle from firing. Proceed slowly and deliberately, always prioritizing safety.
Making Small Incremental Adjustments
Avoid drastic changes to the trigger pull weight. Instead, implement a process of small, incremental adjustments. A quarter-turn of the adjustment screw is often sufficient to notice a change in pull weight. After each adjustment, thoroughly test the trigger function with snap caps – never live ammunition.
Document each adjustment, noting the direction (clockwise or counter-clockwise) and the amount of turn. This allows you to return to a previous setting if necessary. Patience is key; achieving the desired pull weight requires a methodical approach.
Continuously evaluate the trigger feel after each adjustment, focusing on smoothness and consistency. Remember, the goal is a safe and predictable trigger pull.
Fine-Tuning the Trigger for Optimal Performance
Refine the trigger by addressing creep and over-travel, ensuring a consistent pull.
Careful adjustments enhance accuracy and shooting experience, demanding meticulous evaluation and testing.
Adjusting for Creep (If Possible)
Creep, the amount of trigger travel before the firing pin releases, is a subjective element of trigger quality. The Ruger American trigger system, particularly in earlier models, may exhibit some creep. However, significant adjustment specifically for creep is often limited. Unlike some aftermarket triggers, the factory Ruger American trigger doesn’t typically offer a dedicated creep adjustment screw.
Instead, minimizing perceived creep often involves carefully refining the overall pull weight. A slightly heavier pull weight can sometimes mask minor creep, making the trigger feel crisper. Incremental adjustments to the pull weight screw, as detailed previously, are key. Remember to make small changes and thoroughly test after each adjustment.
If excessive creep persists despite pull weight adjustments, it may indicate a need for professional gunsmithing or consideration of an aftermarket trigger upgrade designed for creep reduction. Always prioritize safety and consult a qualified professional if unsure.
Addressing Over-Travel Issues
Over-travel, the distance the trigger continues to move after the shot breaks, is another aspect impacting trigger feel. Some over-travel is normal, but excessive movement can detract from accuracy and perceived quality. The Ruger American trigger, depending on the generation, may or may not have a dedicated over-travel screw.
If your model features an over-travel screw (often located near the trigger pull weight screw), carefully adjust it in small increments. Clockwise adjustments typically reduce over-travel, while counter-clockwise adjustments increase it. Monitor the trigger’s behavior after each adjustment, ensuring it doesn’t interfere with reset.
If no over-travel screw is present, minimizing over-travel is often achieved through precise pull weight adjustment. A slightly heavier pull can sometimes reduce the sensation of excessive travel. Professional gunsmithing may be required for significant over-travel correction.
Checking for Consistent Trigger Pull
After any adjustment, verifying a consistent trigger pull is paramount for accuracy and safety. Inconsistency can indicate binding, improper screw tension, or internal friction. Utilize a calibrated trigger pull scale to measure pull weight across multiple pulls – at least five to ten – at various points on the trigger’s travel.
Record each measurement and analyze for deviations. Ideally, readings should fall within a narrow range (e.g., +/- 0.5 lbs). Significant fluctuations necessitate further adjustment. Slowly re-adjust the pull weight screw, making minute changes and re-testing until consistent results are achieved.
Dry-firing (with snap caps!) allows you to feel for any hitches or roughness during the pull. A smooth, consistent pull is the goal. If issues persist, professional inspection is recommended.

Ruger American Gen 2 Trigger Specifics
Gen 2 triggers feature different adjustment mechanisms, with a screw location varying from earlier models.
Recommended pull weights generally fall within a specified range for optimal performance.
Differences in Adjustment Mechanisms
The Ruger American Gen 2 trigger system represents a significant evolution from the original design, primarily focusing on a smoother pull and reduced creep. Unlike the first generation, the Gen 2 utilizes a different internal geometry and, crucially, a revised adjustment screw configuration. Early models often relied on a single screw to control both pull weight and over-travel, requiring iterative adjustments to achieve desired results.
The Gen 2, however, often separates these functions, potentially incorporating dedicated screws for pull weight and over-travel. This separation allows for more precise tuning, minimizing the need for compromise between the two parameters. Furthermore, the Gen 2’s internal components exhibit refined surface finishes and tighter tolerances, contributing to the improved trigger feel. Understanding these mechanical differences is paramount before attempting any adjustments, as applying techniques intended for the original Ruger American may yield unsatisfactory or even detrimental results.
Gen 2 Trigger Adjustment Screw Location
Locating the adjustment screw on the Ruger American Gen 2 trigger requires careful observation. Typically, the pull weight adjustment screw is situated within the trigger guard, accessible from the bottom of the rifle. It’s often a small, recessed screw requiring a specialized wrench or a properly sized Allen key – commonly found in trigger adjustment kits.
Unlike some earlier models, the Gen 2 screw may be positioned further back, closer to the receiver, and potentially partially obscured by the trigger itself. Some variations might feature a separate screw for over-travel adjustment, usually located nearby. Always consult high-resolution images or videos specific to your rifle’s model year to confirm the exact location before attempting any adjustments. Incorrectly identifying the screw could lead to unintended consequences.
Recommended Pull Weight Range for Gen 2
Ruger specifies a minimum trigger pull weight for safety reasons, and the Gen 2 models generally allow for adjustment within a defined range. While individual preferences vary, a recommended pull weight for the Ruger American Gen 2 typically falls between 3 and 5 pounds. This provides a balance between accuracy and safe handling.
Experienced shooters might prefer a lighter pull, but going below the manufacturer’s minimum (often around 3 pounds) is generally discouraged due to potential safety concerns. Adjusting to a heavier pull can improve consistency for those new to precision shooting. Always prioritize safety and thoroughly test the trigger after any adjustment, ensuring a clean break and reliable function before using live ammunition.

Troubleshooting Common Issues
Common problems include trigger reset failures, accidental discharges post-adjustment, and difficulty achieving the desired pull weight. Careful re-evaluation and professional help are vital;
Trigger Not Resetting Properly
A trigger failing to reset after firing is a serious concern, potentially leading to a failure to fire subsequent rounds. This often indicates an issue with the trigger components’ interaction or an overly tight adjustment; Begin by carefully disassembling the trigger group, ensuring you follow Ruger’s instructions meticulously.
Inspect all parts for damage or excessive wear, paying close attention to the sear and hammer engagement surfaces. Ensure proper lubrication is applied to all moving parts. If the issue persists, slightly loosen the trigger pull weight screw in small increments, testing the reset after each adjustment.
Avoid over-adjusting, as this can exacerbate the problem. If you are uncomfortable with disassembly or troubleshooting, seeking a qualified gunsmith’s assistance is highly recommended to ensure safe and reliable operation.
Accidental Discharges After Adjustment
Accidental discharges following trigger adjustment are extremely dangerous and demand immediate attention. This usually stems from a reduced pull weight combined with a compromised safety mechanism or improper reassembly. Immediately cease use of the rifle and thoroughly re-examine the entire trigger system.
Verify the safety mechanism functions correctly, ensuring it positively blocks the trigger when engaged. Double-check the trigger pull weight, increasing it to a safe and reliable level – adhering to Ruger’s minimum specifications. Carefully inspect for any binding or interference within the trigger group.
If uncertainty exists, consult a qualified gunsmith. Never compromise on safety. A professional inspection can identify subtle issues missed during self-diagnosis, preventing potentially catastrophic consequences. Prioritize safety above all else.
Difficulty Achieving Desired Pull Weight
Encountering trouble reaching the intended trigger pull weight is common, often due to several factors. The adjustment screw may be fully turned in or out without achieving the desired result, indicating a potential issue beyond simple adjustment. Inspect the screw for damage or stripped threads, hindering proper engagement.
Ensure no debris or foreign material obstructs the trigger mechanism. A buildup of dirt or grime can create friction, affecting pull weight. If the problem persists, the trigger components themselves might be worn or damaged, requiring replacement. Remember Ruger’s minimum pull weight.
Consider seeking professional assistance. A gunsmith can diagnose underlying problems and recommend appropriate solutions, ensuring safe and effective operation. Don’t force adjustments; it could cause further damage.

Post-Adjustment Verification and Safety Checks

Thoroughly test the rifle with snap caps to verify proper function and reset. Re-evaluate all safety mechanisms, and consider a professional inspection for peace of mind.
Function Testing with Snap Caps
After any trigger adjustment, rigorous function testing is paramount. Utilize snap caps – non-firing cartridges designed to mimic live rounds – to safely assess the rifle’s operation. Cycle the action repeatedly, observing the trigger’s reset point and ensuring consistent engagement.
Pay close attention to any unusual resistance or “mushiness” in the trigger pull. Verify that the safety mechanism functions correctly both when engaged and disengaged. Conduct at least twenty dry-fire repetitions with snap caps, carefully monitoring for any signs of malfunction or unintended release.
This process confirms the adjustment hasn’t compromised the rifle’s inherent safety features or created unintended mechanical issues. Snap caps protect the firing pin and chamber from repeated dry-firing impacts, preserving the rifle’s longevity. A smooth, consistent trigger pull and reliable safety operation are the goals of this crucial verification step.
Re-Evaluating Safety Mechanisms
Post-adjustment, a thorough re-evaluation of all safety mechanisms is non-negotiable. Specifically, confirm the rifle’s safety lever engages and disengages smoothly and positively, preventing any accidental trigger activation. Ensure the safety consistently blocks the firing pin, even with a lighter trigger pull.
Visually inspect the safety components for any signs of damage or interference. Cycle the action with the safety engaged to verify it remains secure throughout the entire operating cycle. Double-check that the trigger cannot be pulled when the safety is applied.
Remember, altering the trigger can potentially affect safety functions, so meticulous testing is vital. Prioritize safety above all else; a properly functioning safety is the most critical aspect of any firearm. If any doubt exists, seek professional inspection.
Professional Inspection Recommendation
While many experienced gun owners can adjust a Ruger American trigger, a professional inspection is strongly recommended, especially after any modification. A qualified gunsmith can verify the adjustment was performed correctly and that all safety mechanisms remain fully functional. They possess specialized tools and expertise to assess the trigger pull weight accurately.

A professional can identify potential issues you might miss, such as improper screw torque or unforeseen interactions between components. This is particularly crucial if you’ve encountered difficulties achieving the desired pull weight or experienced any malfunctions during testing.
Consider a professional inspection as an investment in safety and peace of mind. It ensures your rifle operates reliably and safely, minimizing the risk of accidental discharge or malfunction. Don’t hesitate to seek expert advice if you’re unsure about any aspect of the adjustment process.
Ruger’s Official Specifications and Warnings
Ruger specifies minimum and maximum pull weight limits; exceeding these voids the warranty.
Modification is your responsibility, and improper adjustments can create unsafe conditions.
Minimum and Maximum Pull Weight Limits
Ruger establishes specific pull weight parameters for the American rifle series to ensure both safety and functionality. While adjustments are possible, staying within these limits is crucial for maintaining warranty coverage and responsible firearm ownership. Generally, Ruger specifies a minimum pull weight of 3 pounds, ensuring a deliberate trigger pull to prevent accidental discharges.
The maximum recommended pull weight typically falls around 5.5 pounds, providing a balance between accuracy and ease of operation. Exceeding this upper limit can make accurate shooting more challenging, while falling below the minimum compromises safety. It’s vital to consult the owner’s manual for the precise specifications applicable to your specific Ruger American model, as variations may exist.
Always prioritize safety and avoid excessively light trigger pulls, as they increase the risk of unintended firing. Remember, modifying the trigger beyond Ruger’s recommended range is done at your own risk and may have legal implications.
Warranty Implications of Trigger Adjustment
Modifying the trigger of your Ruger American rifle can significantly impact its warranty coverage. Ruger explicitly states that alterations to the trigger mechanism, including adjustments beyond factory specifications, may void the warranty. This is because such modifications can compromise the firearm’s safety and reliability, potentially leading to malfunctions or accidental discharges.
Ruger’s warranty typically covers defects in materials and workmanship, but it does not extend to issues arising from user-induced modifications. If a problem occurs after a trigger adjustment, Ruger may refuse to repair or replace the firearm under warranty, citing the alteration as the cause of the issue.
It’s crucial to understand these implications before attempting any trigger adjustments. If you’re unsure about the process or concerned about the warranty, consider seeking professional gunsmith services to ensure the work is done correctly and doesn’t invalidate your coverage.
Adjusting a firearm’s trigger is a serious undertaking with inherent risks. This guide provides information based on available resources, but assumes no responsibility for outcomes resulting from user modifications. Individuals performing these adjustments are solely accountable for their actions and the firearm’s subsequent performance.
Incorrect adjustments can lead to unsafe conditions, including accidental discharges, malfunctions, and potential injury. It is imperative to possess a thorough understanding of firearms mechanics and safety procedures before attempting any trigger work.
Always prioritize safety and consult with a qualified gunsmith if you lack confidence or experience. This guide is not a substitute for professional training or expertise. By proceeding with trigger adjustments, you acknowledge and accept full responsibility for any consequences.